Reverse DNS (rDNS) links an IP address to a domain name using PTR records. It's essential for email deliverability, as many servers use it to verify sender legitimacy. Without proper rDNS setup, emails may be flagged as spam.
To configure rDNS:
curl ifconfig.me).mail.example.com) to the server’s IP..in-addr.arpa (e.g., 192.0.2.5 becomes 5.2.0.192.in-addr.arpa).mail.example.com).nslookup or dig.For faster configuration, tools like Mailforge automate rDNS setup, including PTR, SPF, DKIM, and DMARC records. Manual setups may take up to 48 hours for DNS propagation, but automation can reduce this to minutes.
Proper rDNS ensures your emails pass spam filters, especially as email providers enforce stricter standards.
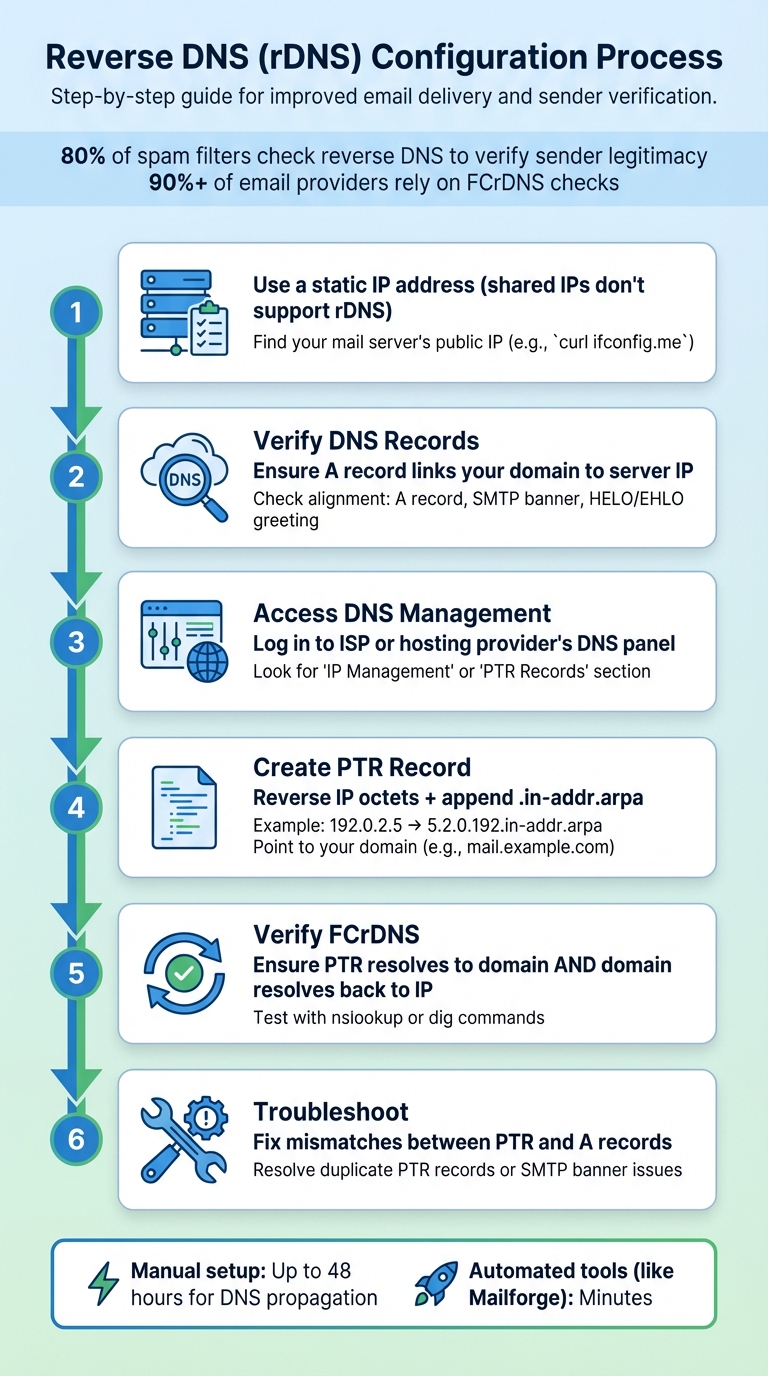
6-Step Process to Configure Reverse DNS for Email Deliverability
Before diving into configuring reverse DNS (rDNS), it’s crucial to have everything you need ready. First, ensure you have a dedicated or static IP address. Shared IPs don’t allow for unique rDNS records, so this step is non-negotiable. Typically, static IPs are assigned to business accounts or dedicated servers by ISPs and hosting providers. Double-check your IP type before moving forward.
The first step is identifying your mail server’s public IP address. Here’s how you can do it:
curl ifconfig.me.ipconfig to check your network settings.Alternatively, you can log in to your hosting provider’s dashboard, where your server’s IP is usually listed. Make a note of this IP - you’ll need it later.
Once you have your IP address, confirm that it’s correctly mapped in your DNS records. Start by checking your A record, which should connect your hostname (like mail.yourdomain.com) to your server’s IP address. Use a command like nslookup mail.yourdomain.com to verify that the returned IP matches your server’s address.
To ensure smooth email delivery, the hostname in your A record must align with your SMTP banner and HELO/EHLO greeting. This alignment is key for passing FCrDNS checks, which over 90% of email providers rely on to validate PTR records.
Editing PTR records requires access to your ISP’s or hosting provider’s DNS control panel. Most users can’t directly modify these records, so you’ll need to locate the relevant section in your panel - look for options like "IP Management", "Reverse DNS," or "PTR Records." If such options aren’t available, you may need to submit a support ticket.
Not sure who controls your IP block? Perform a WHOIS lookup to find the contact information for the responsible provider. Some hosting services offer self-service tools for managing PTR records, while others handle requests manually, which can take a few hours or even days to process.
(function(d,u,ac){var s=d.createElement('script');s.type='text/javascript';s.src='https://a.omappapi.com/app/js/api.min.js';s.async=true;s.dataset.user=u;s.dataset.campaign=ac;d.getElementsByTagName('head')[0].appendChild(s);})(document,372145,'bgla6zdvtvvykvmfmifs');
Once you've confirmed access and verified your DNS records, you're ready to set up reverse DNS. The process involves three key steps: identifying your server details, creating the PTR record in the correct format, and ensuring everything works as expected.
First, identify your public IP address using your preferred method. Make a note of it - you'll need it later.
Next, check if you have permission to modify reverse DNS settings. Run the command dig +nssearch [reversed-ip].in-addr.arpa to find the authoritative nameservers for your IP block. This will tell you who controls the reverse DNS zone. If the nameservers are managed by your hosting provider, determine whether they offer a self-service tool for managing PTR records or if you'll need to contact their support team to make changes.
Once you've confirmed your IP and access permissions, you can move on to creating the PTR record.
To create a PTR record, you'll need to reverse the octets of your IP address and append .in-addr.arpa. For instance, if your IP address is 192.168.1.100, it should be formatted as 100.1.168.192.in-addr.arpa. This will point to a Fully Qualified Domain Name (FQDN), such as mail.example.com.
If you're using manual systems like BIND, remember to add a trailing dot to indicate an FQDN. While many modern hosting platforms handle this automatically, it's a good idea to double-check. It's crucial that the hostname you specify matches your mail server's HELO/EHLO greeting and SMTP banner. Any mismatch here can cause authentication issues, even if the PTR record itself is correct.
Here’s a quick reference for common tools and their purposes:
| Method | Tool/Command | Purpose |
|---|---|---|
| Linux/macOS | curl ifconfig.me |
Find public IP address |
| Windows | nslookup [hostname] |
Identify the IP associated with your mail server |
| Authority Check | dig +nssearch [reversed-ip].in-addr.arpa |
Locate authoritative nameservers |
| Verification | host [IP_ADDRESS] |
Confirm current PTR resolution |
After setting up the PTR record, allow 24–48 hours for DNS propagation. Some providers may update records in just a few hours, but this can vary. To confirm your changes, use commands like nslookup [IP_ADDRESS] or dig -x [IP_ADDRESS] to verify that the PTR record resolves to the correct hostname.
Once the PTR record is in place, proceed to validate the bidirectional mapping with FCrDNS in the next step.
Creating a PTR record is just the first step. To meet email authentication requirements, you also need Forward-Confirmed Reverse DNS (FCrDNS). This ensures that your IP address resolves to a hostname (via the PTR record) and that the hostname resolves back to the same IP address (via the A record). Many email providers rely on this two-way mapping to accept messages.
To test FCrDNS, start with a reverse lookup using dig -x [IP]. This should return your hostname. Then perform a forward lookup: running nslookup mail.example.com should return your original IP address. If both lookups match, you've successfully configured FCrDNS. If they don't, check your A record to ensure the hostname points to the correct IP address.
You can also use online tools to check your FCrDNS status and identify any common configuration issues. If changes aren't reflecting as expected, clear your local DNS cache. On Windows, use ipconfig /flushdns, and on macOS, run sudo killall -HUP mDNSResponder.
Once you've set up your PTR record, it's essential to confirm that everything is working as expected. After DNS propagation completes, you can use tools like nslookup [IP_ADDRESS] or dig -x [IP_ADDRESS] to check if the PTR record properly resolves to the intended hostname. Alternatively, the host [IP_ADDRESS] command will display the associated domain name.
For a more comprehensive analysis, web-based tools such as MXToolbox, DNSChecker, and IntoDNS are incredibly useful. These platforms test your configuration from multiple global locations and can highlight issues like missing A records or SMTP banner mismatches. Sending a test email and reviewing the header for authentication markers (SPF, DKIM, DMARC) can also help ensure your setup meets email security standards.
Proper reverse DNS (rDNS) is crucial for passing spam filters. If any of these tests fail, the next step is to identify and fix the issues outlined below.
One of the most common problems is FCrDNS (Forward-Confirmed Reverse DNS) failure, which occurs when your PTR record points to a hostname, but that hostname's A record doesn't point back to the original IP address. To fix this, ensure both the PTR and A records are perfectly aligned. Email providers like Gmail and Yahoo rely on this match to validate emails.
Another frequent issue is SMTP banner mismatches, which can lead to authentication problems. The HELO/EHLO greeting used by your mail server must exactly match the hostname specified in your PTR record. To resolve this, review your mail server's configuration files - whether you're using Postfix, Exchange, or another platform - and ensure the hostname is consistent across all settings.
Duplicate PTR records for the same IP address can also cause intermittent failures. If you find multiple PTR entries, consolidate them into a single record to avoid inconsistencies.
| Error Message | Likely Cause | Suggested Solution |
|---|---|---|
| No SOA RR found | Name servers aren't responding correctly for the zone | Reload all authoritative name servers |
| Name server not responding | Port 53 is blocked or DNS service is inactive | Check firewall settings and ensure DNS service is active |
| Mismatch between Forward/Reverse | A record for the hostname doesn't match the PTR IP | Update the A record to point to the correct IP address |
| Cross-check failed | Forward and reverse zones use different name servers | Ensure both zones list the same authoritative name servers |
If your changes don't seem to take effect, clear your local DNS cache. On Windows, use ipconfig /flushdns, and on macOS, run sudo killall -HUP mDNSResponder. To speed up propagation, consider lowering your TTL (Time to Live) values a day or two before making changes.
For more complex issues, such as delegation problems, the dig -x [IP_ADDRESS] +trace command can be invaluable. This command traces the entire lookup chain, pinpointing where the resolution fails - often at the ISP level, where they may need to delegate the reverse zone to your nameservers.
Up next, we'll explore how Mailforge simplifies these DNS tasks, making email validation a breeze.
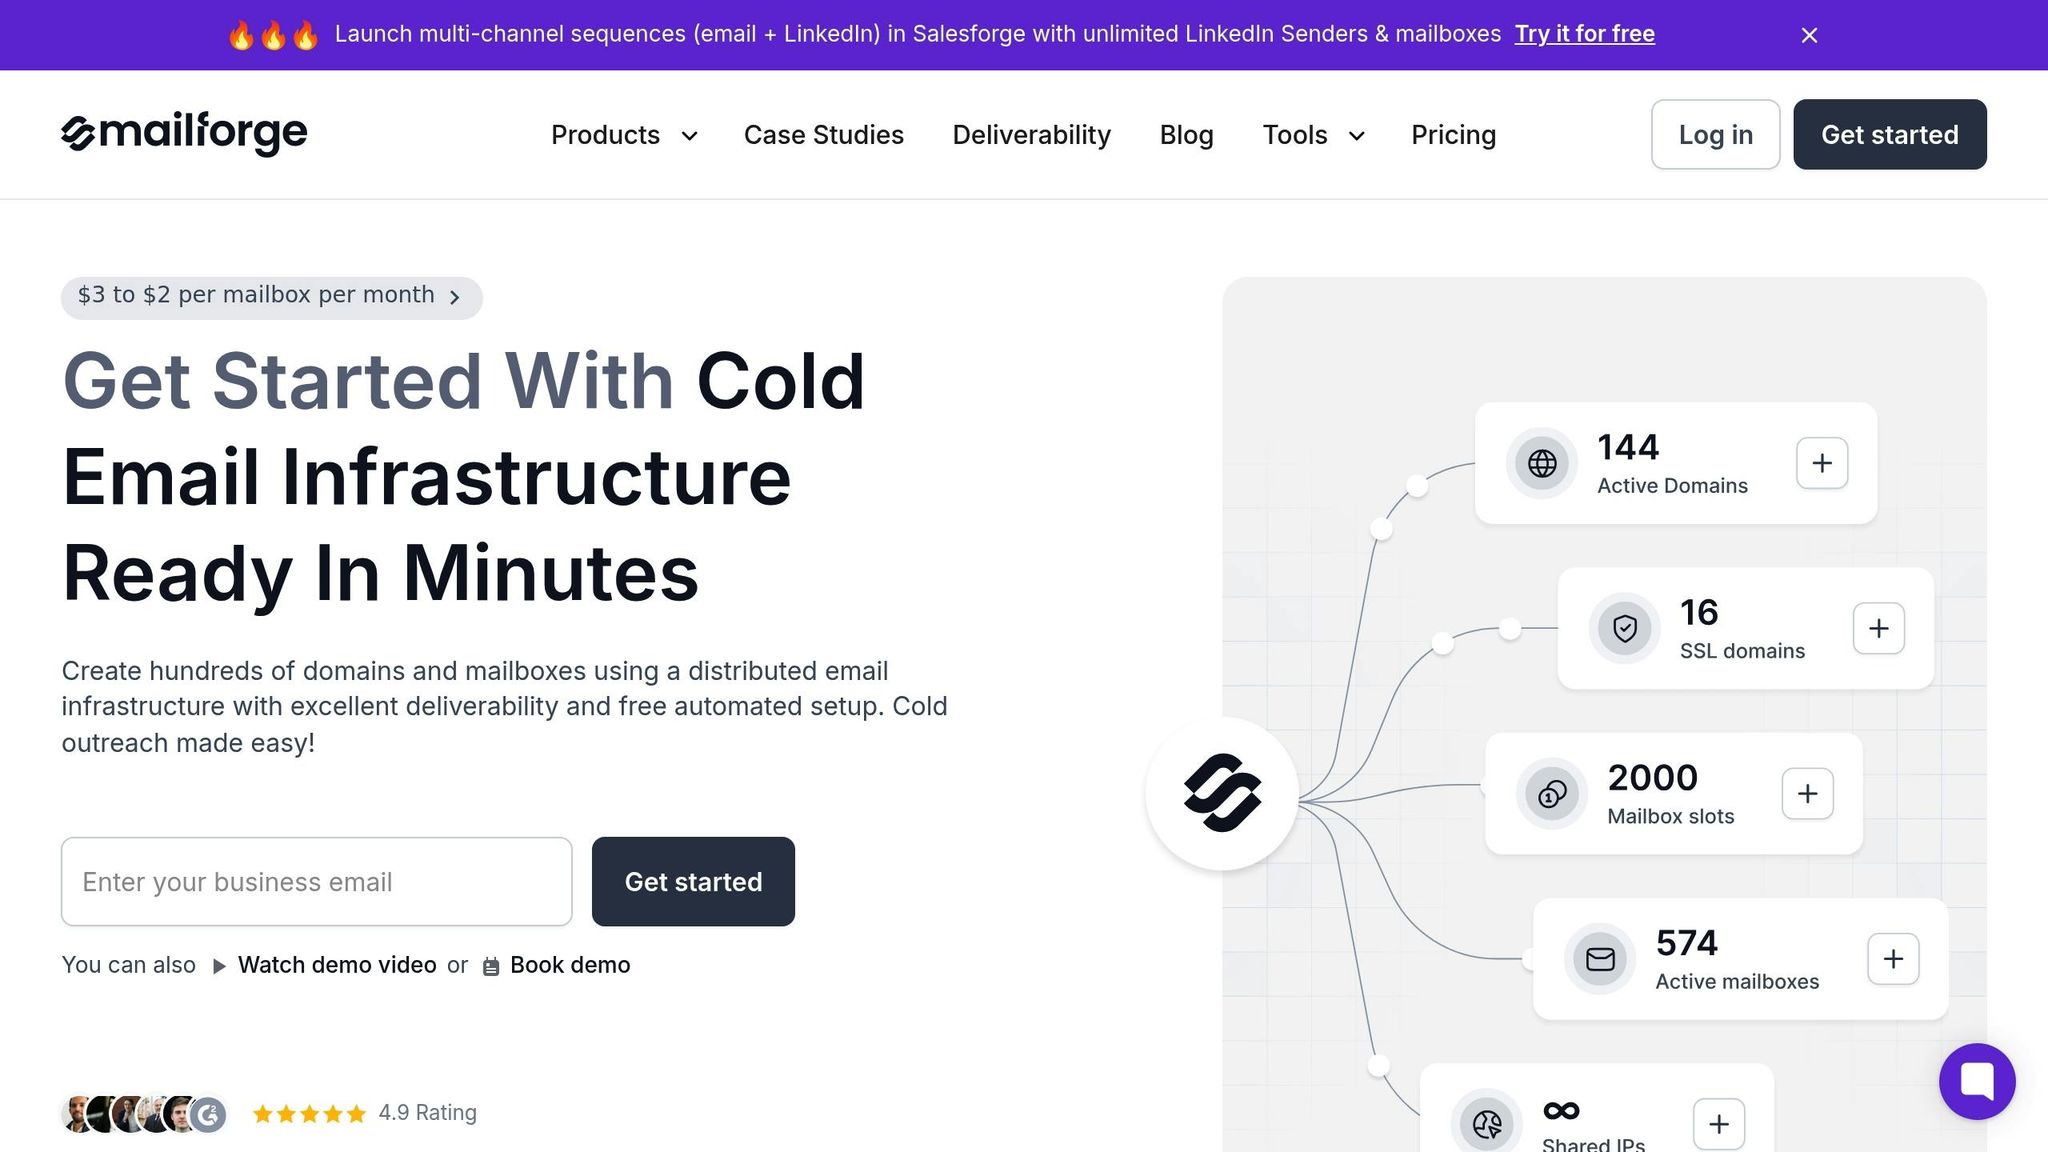
Setting up DNS manually can be a time-consuming process, especially when managing multiple domains for cold email outreach. This is where Mailforge steps in to simplify the process. By automating reverse DNS setup, including essential configurations like PTR records, SPF, DKIM, and DMARC, Mailforge takes the hassle out of managing DNS records. All you need to do is update your domain's nameservers to Mailforge's, and the platform handles the rest - typically completing the setup in about 5 minutes.
This automation ensures compliance with Forward-Confirmed Reverse DNS (FCrDNS) by aligning A records and PTR records automatically. Why does this matter? Because about 80% of spam filters check reverse DNS to verify the sender’s legitimacy. Without proper rDNS configuration, your outreach efforts could hit a wall.
A client using Infraforge, another tool in The Forge Stack, shared: "Infraforge quickly helped to solve a challenge regarding email deliverability. What I like about Infraforge is its ease of use and quality of support." - Silver L, CEO
Mailforge also offers a bulk DNS update feature, which is a game-changer for scaling operations. Instead of manually updating records for each domain, you can make changes across hundreds - or even thousands - of domains with just a few clicks. Plus, real-time monitoring and automated alerts help you catch DNS propagation issues early, ensuring your campaigns run smoothly as you scale.
Mailforge doesn’t just stop at DNS automation. It integrates seamlessly with The Forge Stack, a suite of tools built specifically for scaling cold email campaigns. Once your reverse DNS setup is automated, you can connect to Salesforge to manage multi-channel sequences and outreach campaigns. And with Warmforge - included free with any Salesforge subscription - your mailboxes are automatically warmed up to protect your sender reputation.
"If you're serious about outreach and want the best tool in the market, Infraforge is the only choice. Its deliverability and impact are unmatched." - Rahul Lakhaney, CEO, Enrich.so
Mailforge also offers advanced features like SSL and domain masking to enhance security and professionalism. Pricing is straightforward: $2 per domain per month (billed monthly) or $6 per domain per year (billed annually). These features are especially useful for agencies handling client outreach or enterprises managing thousands of mailboxes. By automating the technical heavy lifting, Mailforge allows you to focus on scaling without the usual bottlenecks. For tailored pricing, visit Mailforge’s pricing page.
Setting up reverse DNS (rDNS) is a key step in ensuring your emails make it past spam filters and into inboxes. The process involves four crucial steps: identifying your server's public IP, setting the A record, creating the PTR record, and verifying Forward-Confirmed Reverse DNS (FCrDNS). Skipping proper rDNS configuration could leave your emails flagged as spam before they even reach their destination.
While manual configuration can be time-consuming - taking hours or even days - automation tools can drastically simplify the process. Mailforge, for instance, streamlines DNS setup, cutting it down to just about 5 minutes. Its bulk DNS update feature allows you to manage hundreds or even thousands of domains at once, eliminating the need for endless support tickets or manual edits. This not only speeds up the setup but also strengthens your sender reputation.
With email providers like Google and Yahoo enforcing stricter authentication standards as of February 1, 2024, valid PTR records and FCrDNS have become non-negotiable for bulk senders. By opting for dedicated IP addresses through Mailforge, you safeguard your reputation and steer clear of the pitfalls that come with shared IP blocks.
A static IP address plays a key role in reverse DNS because it provides a steady and dependable link between an IP address and a hostname via a PTR record. Unlike dynamic IPs, which are prone to frequent changes, static IPs ensure the consistent one-to-one connection that's necessary for proper email authentication. This stability helps emails pass spam filters and boosts deliverability by building trust with receiving servers.
For those managing several domains or mailboxes, tools like Mailforge can make life easier. They automate DNS tasks, including reverse DNS setup, reducing the time and effort required to handle these configurations.
Forward-Confirmed Reverse DNS (FCrDNS) is a method used to verify that an IP address and its corresponding reverse DNS entry align with a domain name. Essentially, it ensures that the IP address points to the domain name and that the domain name also resolves back to the same IP address. This process adds an extra layer of credibility.
Setting up FCrDNS can play a crucial role in improving email deliverability. It signals to email servers that your domain is properly configured and trustworthy, which helps reduce the chances of your emails being marked as spam. This is especially important for maintaining a solid sender reputation, particularly when running large-scale email campaigns through platforms like Mailforge. Proper DNS setup, including FCrDNS, is a key step in ensuring your emails land in recipients' inboxes.
Setting up reverse DNS (rDNS) can feel like a challenge, but knowing the common hurdles can make troubleshooting much easier:
nslookup can help you verify the setup.
Pay close attention to details like zone syntax, delegation settings, and redundancy to avoid common errors. Addressing these factors will help you set up reverse DNS correctly and enhance your email deliverability.