
Personalized Outbound Strategy
Get The Right Outbound Strategy In Minutes
Enter your email to get a custom plan & stack recommendation for your business
It's being carefully crafted by AI
Please check your mailbox in 5 minutes
If you’re trying to automate bulk email sending using Claude Code, you’re probably already comfortable generating emails.
You can give Claude a prompt, pass a few variables, and get personalized emails in seconds. That part is simple.
The real challenge starts when you try to use those emails in a real campaign.
This is where most people get stuck, not in writing emails, but in turning that into a working system.
In this guide, I’ll walk you through a simple setup that covers both sides.
You’ll learn:
By the end, you’ll have a clear, practical system you can actually run, not just a way to generate emails.
Here’s the complete setup in short:
Once this is done, the flow becomes simple, you add leads, and the system handles generation, sending, and tracking.
To automate bulk email sending with Claude Code, you need two things in place.
For the outreach part, you can use a tool like Salesforge.
Here’s what each part actually does:
It means
Claude → generates emails
Salesforge → sends, warms, and manages campaigns
If you only use Claude, you’ll have emails ready, but no reliable way to send or scale them.
Start with your lead list (name, company, context).
Claude Code generates a personalized email for each contact.
Those emails move into your sending setup, where:
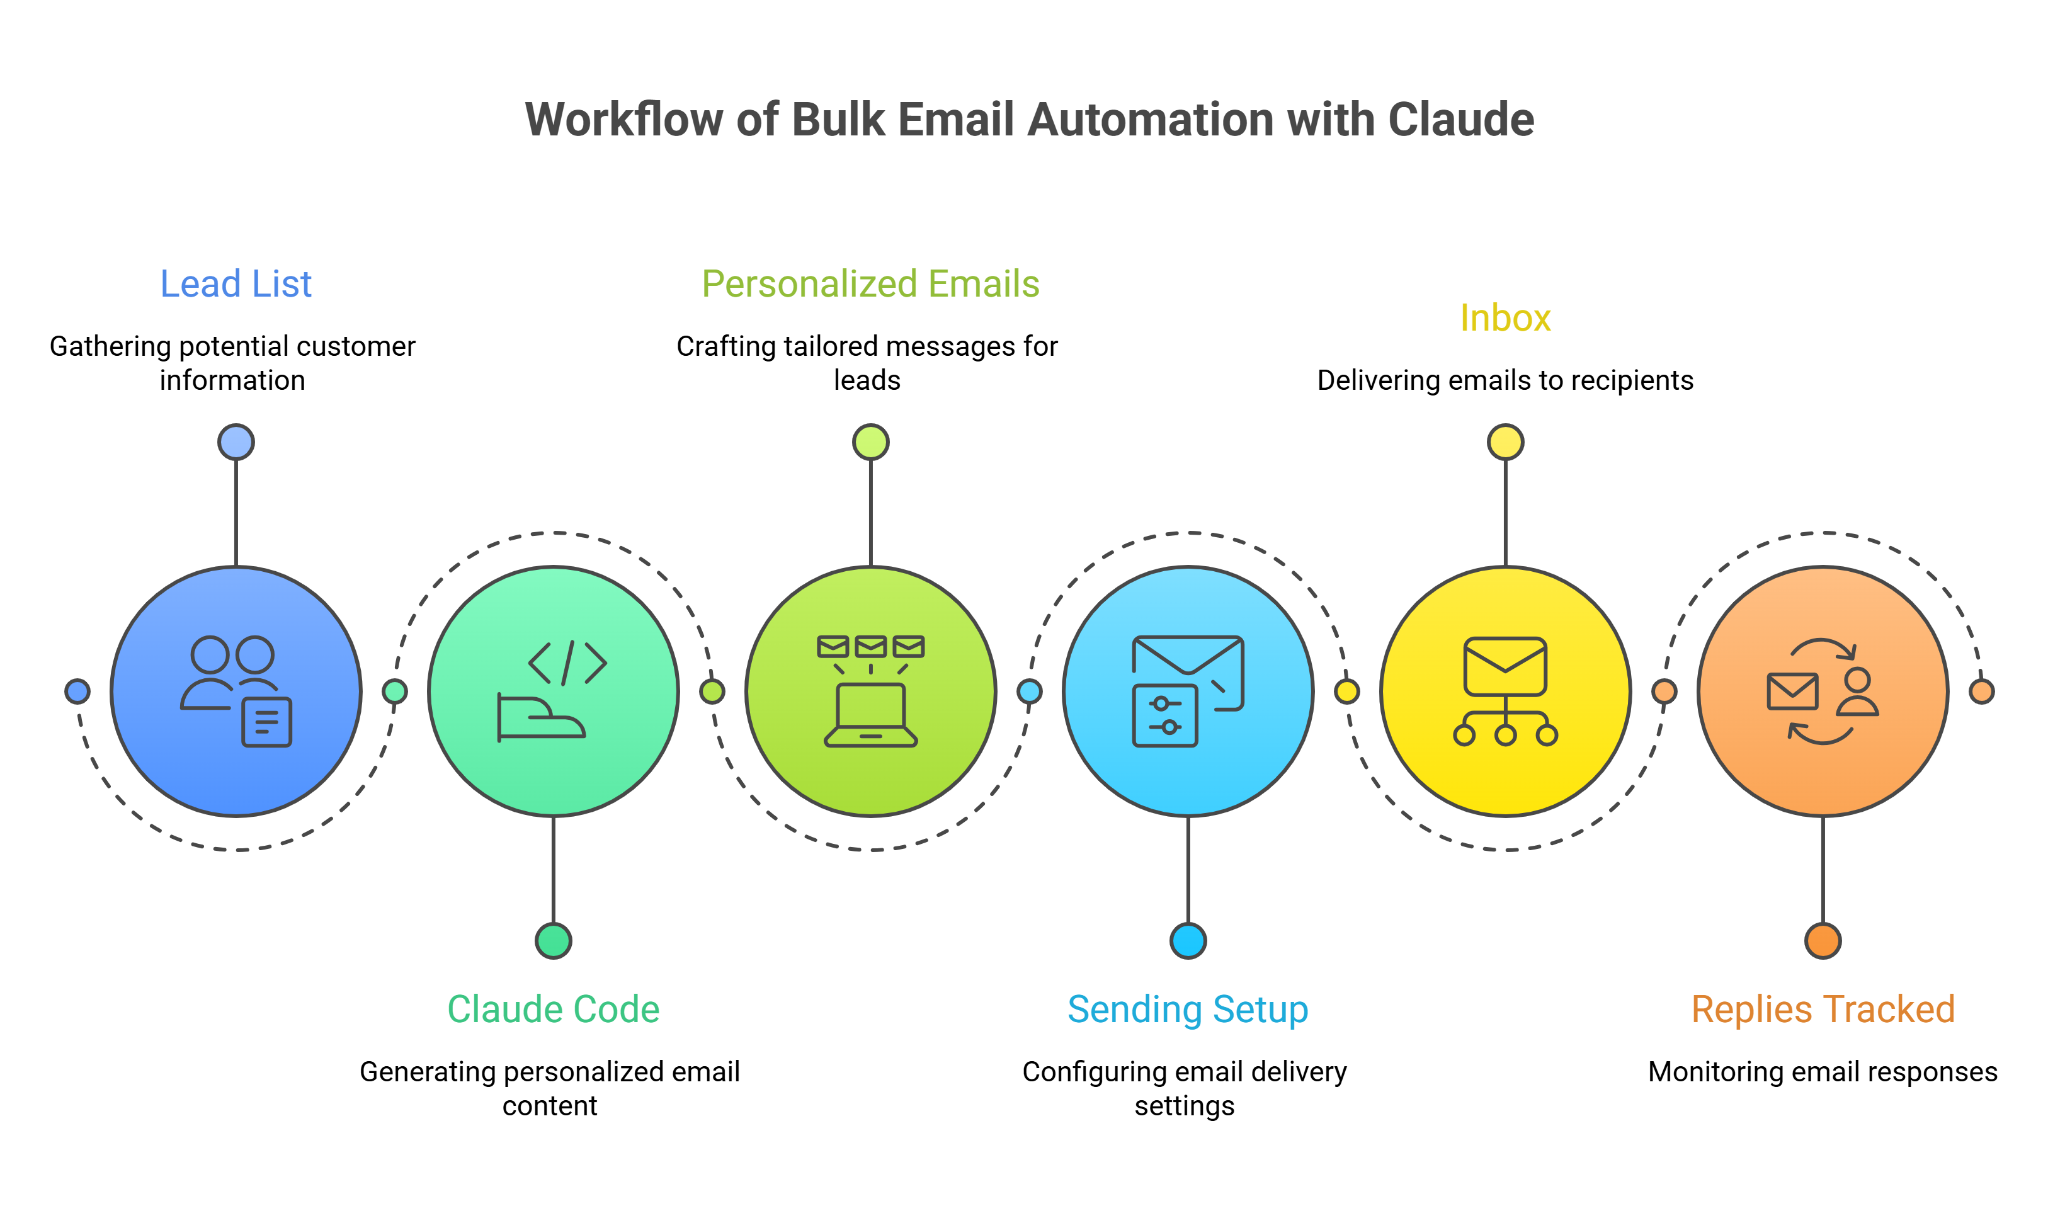
The workflow is simple:
Lead list → Claude Code → personalized emails → sending setup → inbox → replies tracked
Once this is set up, you’re not writing or sending emails manually, the system handles it end to end.
I’ll show you how to set this up step by step, so you can go from generating emails to actually sending them without confusion.
This is the list of people you want to email.
Create a file called leads.csv:
name,email,company,website
John Doe,[email protected],Acme Inc,acme.com
Jane Smith,[email protected],TechFlow,techflow.io
Each row represents one contact.
Save this file in your project folder.
Your script will read this file and use it to generate emails.
These packages are needed to read your CSV file and generate emails using Claude.
Run:
npm install @anthropic-ai/sdk csv-parser dotenv
Your API key is required to generate emails using Claude.
Create a .env file:
ANTHROPIC_API_KEY=your_api_key_here
Replace your_api_key_here with your actual API key.
This script reads your lead file and generates one email per contact.
Create generate.js:
import fs from "fs";
import csv from "csv-parser";
import Anthropic from "@anthropic-ai/sdk";
import dotenv from "dotenv";
dotenv.config();
const anthropic = new Anthropic({
apiKey: process.env.ANTHROPIC_API_KEY,
});
const leads = [];
fs.createReadStream("leads.csv")
.pipe(csv())
.on("data", (row) => leads.push(row))
.on("end", async () => {
for (const lead of leads) {
const prompt = `
Write a short cold email.
Name: ${lead.name}
Company: ${lead.company}
Website: ${lead.website}
Keep it simple and under 100 words.
`;
const response = await anthropic.messages.create({
model: "claude-3-opus-20240229",
max_tokens: 300,
messages: [{ role: "user", content: prompt }],
});
const emailText = response.content[0].text;
console.log(emailText);
}
});
Run:
node generate.js
This will print one generated email for each contact in your terminal.
You need this key to connect your Claude setup with Salesforge.
This step connects Claude Code to your outreach setup.
Run:
claude mcp add salesforge \
 --transport streamable-http \
 --url https://mcp.salesforge.ai/mcp \
 --header "X-Salesforge-Key: YOUR_SALESFORGE_API_KEY"
Replace YOUR_SALESFORGE_API_KEY with your actual key.
Check if the connection is working.
Ask Claude:
If you see your data, the connection is successful.
These are the inboxes from which emails will be sent.
Inside Salesforge:
You can also use:
This loads your leads into the system.
This defines how emails will be sent.
This starts your outreach.
This helps you understand performance.
Inside Salesforge:
Once this is set up, everything runs in one flow, you add leads, and the system takes care of generating, sending, and tracking your emails.
These are the common mistakes I’ve seen people make when setting up automated bulk email sending with Claude Code.
If your CSV has missing or broken fields (empty name, wrong email), Claude will generate bad output or your flow will break.
Fix:
If you don’t limit output size, responses can become too long or inconsistent.
Fix:
If your prompt is loose, output will vary too much.
Fix:
If you try to mix everything together, debugging becomes hard.
Fix:
Even inside tools, bad email configuration can cause issues.
Fix:
Do not send all emails from one inbox.
Fix:
If fields are mismatched in your outreach tool:
Fix:
If you don’t check replies, you won’t improve.
Fix:
Fix these early, and your bulk email automation setup with Claude Code will stay stable as you scale.
Enter your email to get a custom plan & stack recommendation for your business
Please check your mailbox in 5 minutes

Automating bulk email sending with Claude Code is about setting up a clear flow that runs without manual work.
You start with your lead list.
Claude Code generates a personalized email for each contact.
Salesforge handles sending, follow-ups, and tracking.
Once these steps are connected, bulk email sending becomes a repeatable system.
Keep each part simple:
Set it up once, test it on a small batch, and then use the same flow to run your campaigns at scale.
Turn your Claude setup into an outbound system with Salesforge, sending, follow-ups, tracking, plus Warmforge and Mailforge in one place.